This is probably the most complex step in building the Raptor. It's not difficult but can be confusing in certain areas. I've taken additional photos to help clarify what needs to be done.
لعل ذلك هو الخطوة الاكثر تعقيدا في بناء raptor. انها ليست صعبة ولكنها يمكن ان تكون مربكه في بعض المناطق. لقد اتخذت صور اضافية للمساعدة في توضيح ما ينبغي القيام به. 
The parts bag for this assembly...
أجزاء الحقيبه لهذه الجمعية... 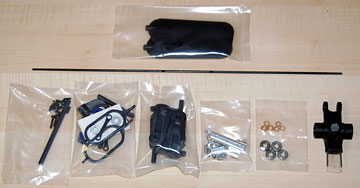
which breaks down into several more parts bags.
الذي ينهار الى اكثر من أجزاء عدة اكياس. 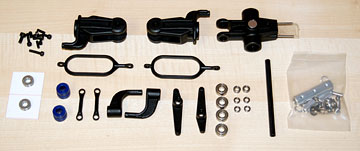
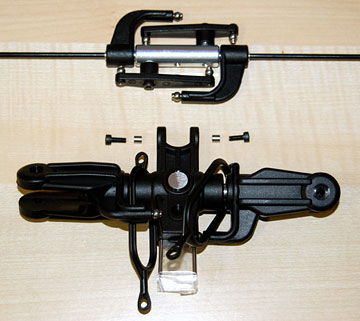
Parts for the main rotor head assembly.
الاجزاء الرئيسية الدوار لرئيس الجمعية العامة. 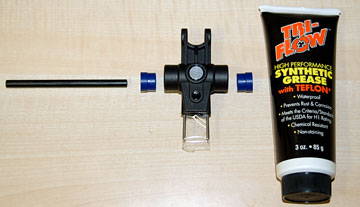
Grease the outside and inside of the rubber flap dampers using a non-petroleum grease.
الشحوم من الخارج والداخل من المطاط دحرج الموهنات باستخدام غير البتروليه الشحوم. 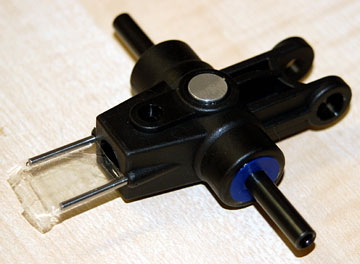
Insert the flap dampers into the main rotor hub . Slide the feathering shaft through the flap dampers. Get it more or less centered.
تضاف الى دحرج الموهنات الرئيسية المحور الدوار. حزا الترييش رمح من خلال دحرج الموهنات. يحصل عليها تتمحور اكثر او اقل. 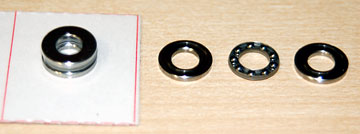
The thrust bearings are shrink wrapped because they are actually three pieces each.
اتجاهات هي فحوي لف يتقلص بسبب انها في الحقيقة كل ثلاث قطع. The two outside bearing races are not the same size but you can't tell just by looking. Pay attention to what you're doing here because this is the one place where it's easy to go wrong.
وإذ تضع هاتين خارج الأجناس ليست هي نفس الحجم ولكن لا يمكنك ان تتحقق من خلال النظر فقط. ايلاء الاهتمام الى ما كنت تفعل هنا لان هذا هو مكان واحد حيث يكون من السهل على خطأ.
Slide each race on the feathering shaft. Wiggle it to find which one has a larger hole. One of the races will wiggle much more than the other.
الشريحه كل سباق على الترييش رمح. تلو هو ان يجد المرء اكبر ثقب. واحد من الاعراق تلو اكثر بكثير من غيرها. The race with the larger hole goes to the inside. The race with the smaller hole goes toward the blade.
السباق مع أكبر ثقب يذهب الى الداخل. السباق مع اصغر ثقب يذهب في اتجاه الشفره.

The main rotor pitch housing and associated parts.
الرئيسية الدوار رمية الاسكان وما يرتبط بها من أجزاء. 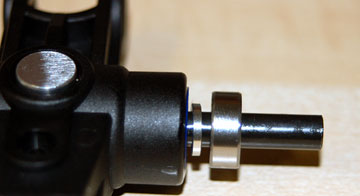
Slide the aluminum flap collar onto the feathering shaft.
الشريحه الالومنيوم دحرج ياقه اتجه الى الترييش رمح. Slide on the bearing , flybar control rods and then the main rotor pitch housing.
وإذ تضع على الشريحه ، flybar وقضبان التحكم الرئيسية الدوار ثم رميه في السكن. 
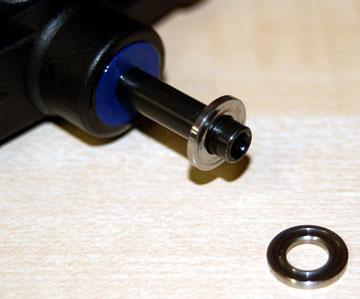
These are the parts that go inside the main rotor pitch housing shown in the order they are inserted.
هذه هي الاجزاء التي تذهب داخل الملعب الرئيسي الدوار السكن المبينه في النظام وهي تندس. The first part to go in is the thrust bearing . Again, make sure the larger hole is in and the smaller hole is out.
الجزء الاول هو الذهاب في
اتجاه واضعه. مرة اخرى ، للتأكد من الثقب الاكبر والاصغر في الثقب.
After the bearing is inserted, slide on the thin flat washer followed by the bearing and then the tapered flat washer . Put a small amount of Loctite only in the feathering shaft. Thread the bolt into the end of the feathering shaft to hold it all in place.
بعد ان حمل هو عبارة ، على شريحة
رقيقة شقة الغساله التي تتبعها
وحمل ومستدق ثم
شقة الغساله. وضع كمية صغيرة من loctite الا في الترييش رمح. الترباس الخيط الى نهاية للالترييش رمح لاجراء كل ذلك في مكان.
Place a hex wrench in each of the main rotor pitch housing bolts and tighten them securely.
وضع الهيكس مصدر الحزن في كل من رمية الاسكان الدوار الرئيسي للمسامير وتشديد بصورة آمنة. I didn't put the flybar control rods on and had to remove the main rotor pitch housings so they could be added.
لم أكن وضع flybar السيطرة على قضبان وكان لإزالة الدوار رمية المقرات الرئيسية بحيث انها يمكن ان تكون.
The main rotor pitch housings assembled to the main rotor hub.
الرئيسية الدوار رمية المقرات الرئيسية لتجميع المحور الدوار. 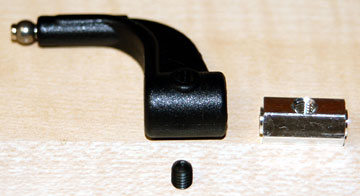
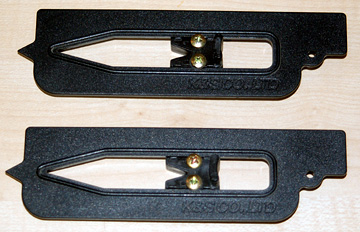
Parts for the flybar control arm .
Flybar قطع الغيار اللازمة لمراقبة التسلح. 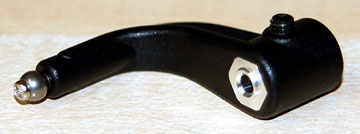
Slide the flybar arm bushing into the flybar control arm. Thread the set screw in a few turns.
حزا flybar البطانه الذراع الى الذراع flybar مراقبة. الخيط برغي في مجموعة قليلة وينتقل. 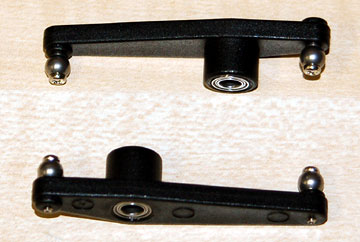
Insert a bearing into each side of each mixing lever .
وإذ تضع يضاف الى كل جانب من كل خلط العتله. Thread two balls onto each lever.
الخيط اثنين من كل
الكرات على العتله.
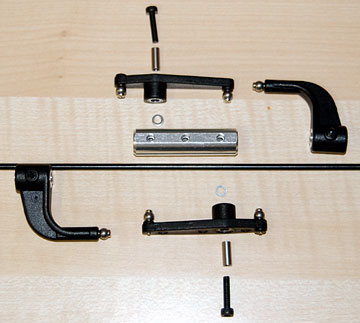
Parts to assemble to the flybar seesaw hub .
لتجميع اجزاء flybar الى محور الارجوحه. Note the washers between the mixing levers and the seesaw hub.
ملاحظه الخلط بين
غسالات والعتلات محور الارجوحه.
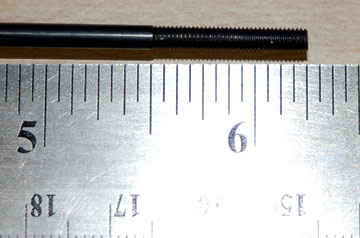
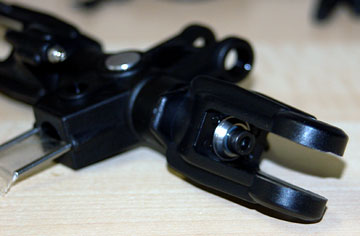
Carefully center the flybar rod in the flybar seesaw hub.
مركز بعناية flybar رود في محور flybar الارجوحه. 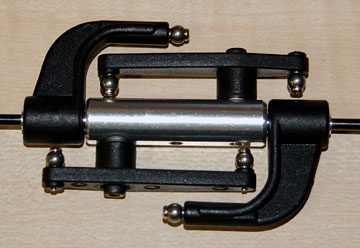
There is flat on each side of the flybar rod for the set screws in the flybar control arms to tighten against. Ensure they are lined up correctly before tightening them.
وهناك شقة على كل جانب من flybar رود لوضع البراغي في flybar لتشديد الرقابة على الاسلحة. كفاله ان يتم بشكل صحيح قبل ان اصطف تضييق عليها. Check that the flybar rod is still centered.
التحقق من ان flybar لا تزال تتمحور حول القضيب.
Add Loctite to the bolts for the mixing levers and bolt the mixing levers to the seesaw hub.
Loctite اضافة الى مسامير لخلط العتلات والترباس الخلط العتلات الى محور الارجوحه.
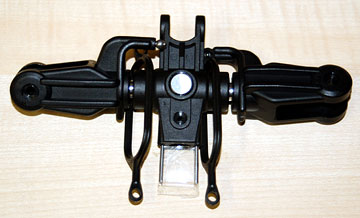
The seesaw hub assembly and main rotor hub assembly.
الارجوحه فان المحور الرئيسي للجمعية ومحور دوار الجمعية. 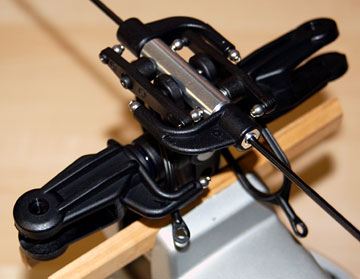
Add Loctite to the two bolts holding the seesaw hub to the main rotor hub and bolt these assemblies together.
Loctite اضافة الى اثنين من مسامير عقد الارجوحه المحور الرئيسي الى محور دوار والترباس هذه الجمعيات معا. 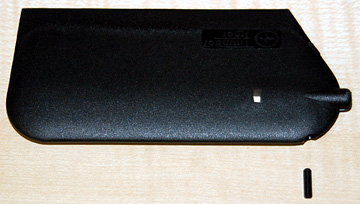
A set screw threads into the front of each flybar paddle.
برغي مجموعة خيوط في كل جبهة من flybar مجذاف. 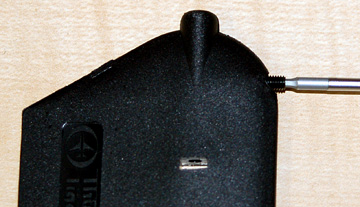
Thread the set screw in several turns.
برغي مجموعة الخيط في عدة تتحول. 
Thread the paddles onto the flybar rod until the end of the flybar rod appears in the window cut-out in the paddle.
الخيط فان المجاذيف اتجه الى flybar حتى نهاية قضيب من قضبان flybar يبدو في وقف نافذة في مجذاف. Measure the distance from the seesaw hub to each paddle to ensure they are exactly the same distance
قياس المسافة من محور الى الارجوحه كل مجذاف للتأكد من انها هي بالضبط المسافة نفسها
The paddles are very difficult to adjust with any degree of accuracy due to the very tight fitting threads.
المجاذيف فإن من الصعب جدا على التكيف مع اي درجة من الدقه نظرا لضيق جدا خيوط المناسب.
I suggest you thread the paddles on as far as they go and then thread them back completely off at least three times to loosen them up a little.
واقترح لكم الخيط فان على المجاذيف ، بقدر ما اذهب والخيط ثم يعيد اليهم تماما من ثلاث مرات على الاقل لتخفف عنها قليلا.
When you thread them on the last time apply a little sewing machine oil or grease to the threads.
عندما كنت لهم على خيط آخر مرة تطبيق قليلا ماكينات الخياطه النفط او الشحوم الى خيوط.
The rotor head turns clockwise. Ensure the paddles face the correct direction.
الدوار رئيس تتحول في اتجاه عقارب الساعة. المجاذيف ضمان مواجهة الاتجاه الصحيح.
A pair of paddle pitch gauges used to ensure the paddles are absolutely level with each other. These do not come with the kit.
زوج من المجذاف رمية المقاييس المستخدمة لضمان مستوى المجاذيف على الاطلاق مع بعضها البعض. وهذه لا تأتي مع هذه المجموعة. 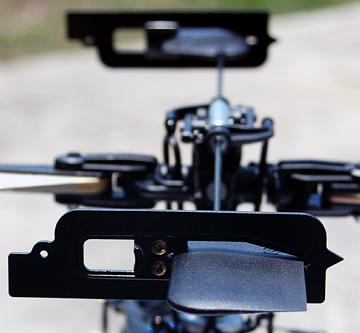
The paddles should be level with each other and with the swashplate when the swashplate is level.
وقد المجاذيف ينبغي ان يكون المستوى فيما بينها ، وكذلك مع swashplate عندما swashplate هو المستوى. This is why you need to loosen the threads. If you don't, then when you try to make minute adjustments to the pitch of either paddle, the flybar rod will twist instead of the paddle turning. It suddenly lets loose and the paddle ends up at some angle other than what you want.
وهذا هو السبب في ان تخفف انت بحاجة الى خيوط. إذا كنت لا ، ثم عند محاولة لجعل الدقيقة ادخال تعديلات على درجة من اي من المجذاف ، flybar رود سوف تويست بدلا من تحول مجذاف. فجاه انه يتيح فضفاضة وينتهي مجذاف حتى في بعض زاويه اخرى غير ما تريد. 
When you are satisfied with the set up, tighten the set screws in the paddles. Don't over-tighten them.
عندما أنت راض عن انشاء ، وتشديد الرقابة مجموعة براغي في المجاذيف. لا اكثر - تشديد لهم.