The parts bag for this assembly.
أجزاء الحقيبه لهذه الجمعية. 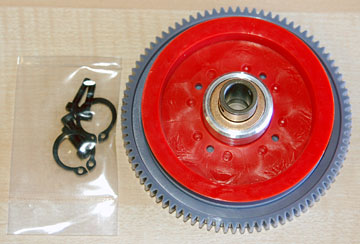
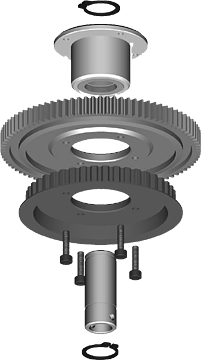
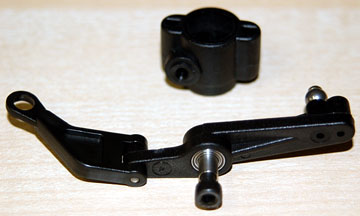
The one way clutch shaft comes inside the one way clutch housing . Remove it.
طريقة واحدة رمح يأتي الفاصل داخل احدى الطرق التشبث الاسكان. ازالتها. 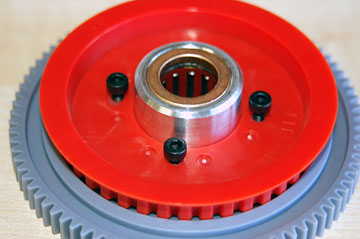
Place a drop of Loctite on each bolt and in the threads of the one way clutch housing.
مكان وبنسبة انخفاض قدرها loctite الترباس وعلى كل الخيوط في واحد من الطريق الفاصل الاسكان. 
If you have a set of snap ring pliers this will be much easier. I don't have a set and used a set of round needle nose pliers to spread the ring.
اذا كان لديك مجموعة من الخاطف الحلقه الزرديه وسيكون ذلك أسهل بكثير. انا ليس لدي مجموعة وتستخدم مجموعة من جولة ابرة الانف الزرديه لنشر الطوق. If this ring comes off then your heli is doomed. Be sure it is fully seated in the groove.
واذا كان هذا الطوق ويأتي بعد ذلك من ماله الخاص بك heli. تأكد من انها كاملة يجلسوا في الأخدود.
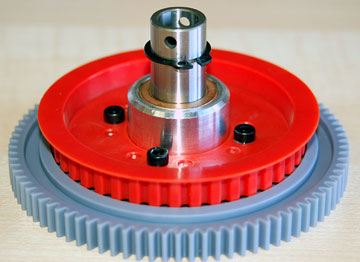
Insert the one way clutch shaft through the gears. Note which end is which.
تضاف احدى الطرق من خلال التشبث رمح التروس. المذكره التي هي الغاية التي. 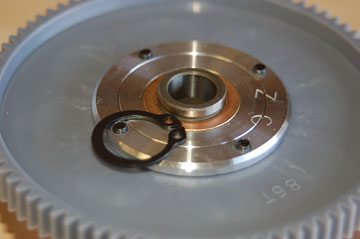
Another snap ring holds the shaft in place.
آخر حلقة الخاطف يحمل رمح في المكان. 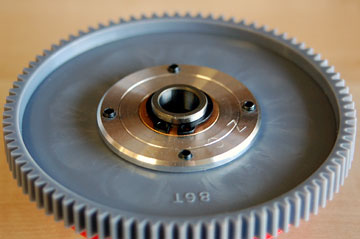
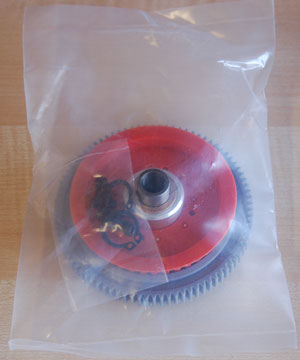
With the snap ring in place, the Main Drive Gear is completely assembled.
مع الخاطف فى مكان الطوق ، والمهمات الرئيسية لمحرك الأقراص تماما تجميعها.
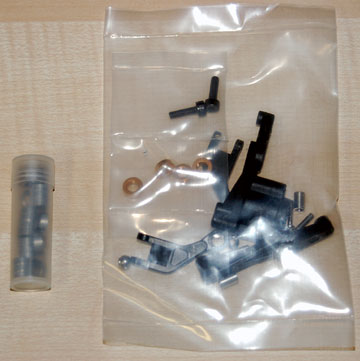
The parts bag needed for this assembly.
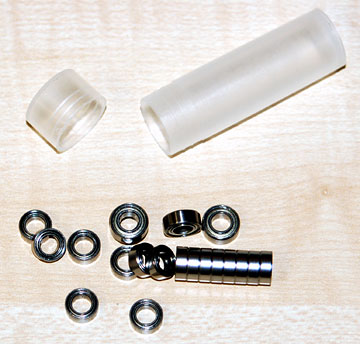
حقيبة الأجزاء اللازمة لهذه الجمعية. I purchased the kit with 29 bearings and purchased the 20 bearing upgrade separately. I don't remember why I did that instead of buying the 49 bearing kit, but I think it was less expensive to do it this way.
أنا أشتري 29 في اتجاهات عدة وقامت بشراء 20) ، وإذ تضع رفع مستوى على حدة. ولا اذكر ماذا فعلت ذلك ، بدلا من شراء مجموعة ال 49 واضعة ، ولكني اعتقد انه كان اقل تكلفة للقيام بهذه الطريقة.
If you buy your kit the same way then you can put all the bronze bushings from the kit with your spare parts. You won't use any of them in this heli.
اذا كنت شراء مجموعة الخاص بك بنفس الطريقة بعد ذلك يمكنك وضع جميع البرونزية البطانات مع مجموعة من قطع الغيار الخاصة بك ، انت لن تستخدم اي من هؤلاء في هذا heli.
This is what you get for your $18.00.
هذا هو ما تحصل عليه لهاتف $ 18،00. 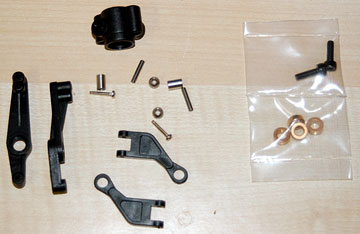
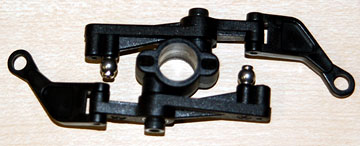
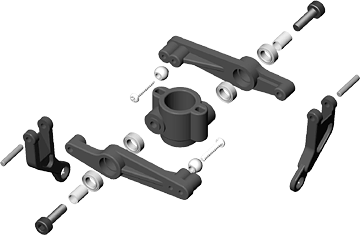
Parts for the washout assembly.
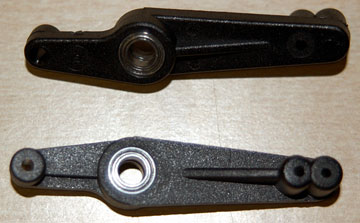
Press a bearing into each side of each flybar control lever .
الصحافة تؤثر في كل جانب من السيطرة على كل flybar العتله. 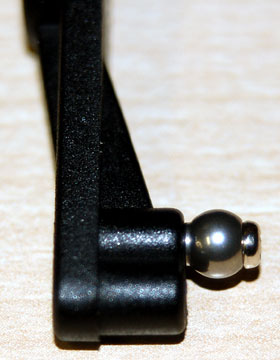 ة.
ة. Use one of the M2 x 10 self-tapping screws to attach a ball to the inside hole.
استخدام واحدة من متر مربع × 10 الذاتي والاستفادة من البراغي ان تعلق الكرة الى داخل الثقب.
Note that the balls have a shoulder on one side. Throughout this build the shoulder will be on the opposite side of the screw head such that it spaces the ball slightly away from whatever it is bolted to.
علما ان لديها كرات تحمل على جانب واحد. طوال هذه بناء الكتف سيكون على الجانب الآخر من رأس البرغي ان هذه المساحات الكرة قليلا بعيدا عن كل ما هو اندفع ل.
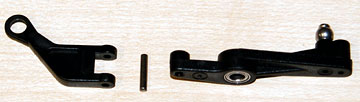
The flybar control linkages are attached the flybar control levers using a press-fit shaft.
وقد flybar مراقبة الروابط تولى السيطرة flybar العتلات باستخدام الصحافة - صالح رمح. Note that the link side of the linkage is on the same side as the ball on the lever.
علما ان وصلة الربط من الجانب هو على نفس الجانب الكرة على العتله.
.
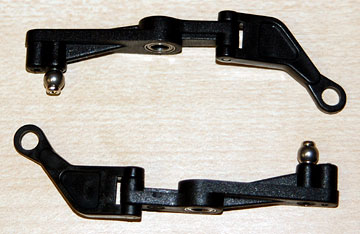
Place a collar inside the bearings of the lever assembly and bolt it to the washout base .
وضع ياقه اتجاهات داخل الجمعية العامة للرافعه والترباس الى قاعدة الفشل. Be careful not to strip the plastic in the base.
ان تحرص على عدم تجريد من البلاستيك في القاعده.